Media
Add images, audio, video, YouTube embeds, and social media content to lessons.
Rich media makes language lessons engaging and memorable. The Lex Editor supports images, audio files, YouTube videos, Twitter embeds, and file attachments -- all inserted directly into your lesson content.
Putting a coursebook page or an exam paper into a lesson is a separate block. Insert PDF from Lesson blocks, pick just the pages you need, and the class can read, annotate, and follow along in it. See PDF Documents.
Images
Uploading Images
Open the Image Insert
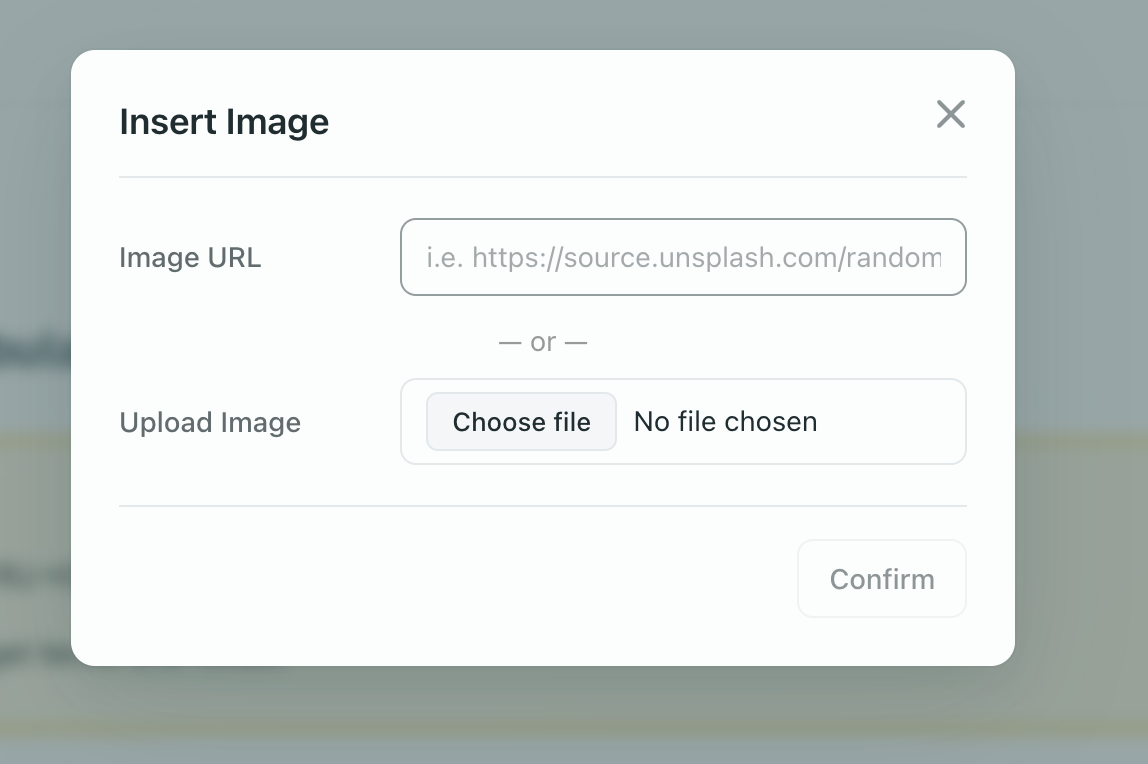
Click the Insert Image button in the toolbar, or type /image in the editor.
Choose a Source
- Upload: select an image file from your computer (JPEG, PNG, WebP, GIF)
- Library: select an image previously uploaded to your school's Materials Library
- URL: paste a URL to an image hosted elsewhere
- Generate with AI: create an image directly from a text prompt
Preview and Crop the Draft
Picking an image from the Library, uploading a file, or generating with AI places the image into a preview draft at the top of the window ("The student will see this picture after you insert it.", or for AI images: "The picture is ready. To put it in the task, click “Insert picture”. You can also generate another one.").
While in draft preview, you can click "Select an area" (or "Change the area" / "Show the whole picture") to crop the picture before inserting it. Clicking outside the window while a draft is active will not accidentally close it.
Configure the Image
- Alt text: describe the image for accessibility (always recommended)
- Caption: optional text displayed below the image
- Size: drag the corner handles to resize after inserting
Insert
Click the focused "Insert picture" button to place the image into your lesson.
Multi-Picture Selection & Drag-and-Drop Order
When inserting multiple images:
- Picture Library Multi-Select: In the Picture Library window, you can select multiple pictures at once. Each selected picture receives a numbered badge indicating its order and appears in the bottom thumbnail strip. Clicking any thumbnail in the strip lets you crop that specific image ("Select part of the picture") before clicking "Insert pictures" to insert all of them together at your cursor in selection order.
- Drag-and-Drop and Paste: Dragging and dropping or pasting multiple picture files into the editor inserts all of them together right at the cursor position in their original file order.
Resizing and Alignment
After inserting an image, click it to select it. You will see:
- Corner handles -- drag to resize proportionally
- Alignment buttons -- left, center, or right alignment
Keep image file sizes under 2 MB for best performance. Large images slow down lesson loading, especially for students on mobile networks.
Selecting an Area of a Picture (Cropping)
Staff can crop any uploaded or library picture in a lesson or widget to focus on a specific region without losing the full image:
- Opening the crop frame: Click "Select an area" on the picture to open the Select part of the picture modal.
- Adjusting the selection: Use the 8-handle interactive frame to adjust the crop region. You can also fine-tune the frame with your keyboard arrow keys, or hold
Shift+ arrow keys for larger steps. - Frame proportions: Choose between Free (custom aspect ratio), As the picture (retaining original proportions), or Square.
- Modifying or restoring: Once cropped, click "Change the area" anytime to readjust the selection, or click "Show the whole picture" to restore the original uncropped image ("The task shows the whole picture again.").
- Exceptions: Selecting an area is not available for animated GIFs ("You cannot select an area in this picture because it is animated.") or external image URLs ("You cannot select an area in this picture because it is stored on another site.").
AI Image Placeholders & Cover Generation
The Lex Editor supports AI-generated imagery for exercises, course covers, and lesson header wallpapers:
-
AI Image Placeholders in Tasks: In exam tasks (such as picture-description speaking prompts), AI generates an image prompt. Review the prompt and click Generate to produce the final image before releasing the lesson to students.
-
AI Cover & Header Wallpaper Generation: When creating course covers or lesson header wallpapers, authors can generate custom visuals using 8 curated visual styles:
- Minimalist — Clean lines, geometric shapes, and uncluttered compositions.
- Watercolor — Soft textures, artistic brushstrokes, and gentle pastel tones.
- 3D Render — Modern dimensional graphics with realistic lighting and depth.
- Line Art — Elegant vector outlines and refined sketches.
- Photographic — Realistic, high-definition photographic scenes.
- Illustrated — Playful, colorful digital storybook illustration.
- Retro / Vintage — Mid-century print aesthetic with muted palette and halftones.
- Cyberpunk / Modern Neon — High-contrast, dynamic futuristic themes.
You can also choose Custom to enter an exact prompt describing the desired atmosphere, subject, or palette.

If an AI-generated lesson leaves an image in edit mode, review the prompt and click Generate before assigning the lesson. Otherwise the student may see an unfinished placeholder instead of the intended image.
Drawing on an Image (Annotate & Laser Pointer)
Every image in a lesson — inserted image, inline image, or image placeholder — supports live annotation. Hover the image to reveal a small toolbar at its top edge with three tools:
| Tool | What it does | Available in |
|---|---|---|
| Draw | Paint freehand strokes directly on the image in a chosen colour. Strokes persist and sync to every collaborator in real time. | Edit mode and read-only mode (including homework) |
| Laser pointer | Temporary pointer dot that follows your cursor and fades. Other participants see it live but nothing is saved. | Edit mode and read-only mode |
| Comment pin | Drag a numbered pin onto the image, then type a comment that grows outward from the pin along a connector line. | Edit mode and read-only mode (including homework) |
The toolbar also exposes a colour picker, Undo (removes your last stroke), and Clear (removes all strokes on this image). Colour, undo, and clear become active while the Draw tool is selected. Teachers can use Undo to delete a single incorrect stroke or Clear to wipe the entire image.

What syncs:
- Strokes save per-image through the collaboration channel, so every student and the teacher see the same annotations on the image immediately.
- Laser pointer uses awareness updates — it appears for everyone in the session but fades on its own; nothing is written to the lesson.
- Resize handles sit outside the image edge so they stay clickable even after you draw close to a border.
Typical uses:
- Circle the correct answer on a picture quiz during a live lesson
- Point at a specific phrase in a text-based image with the laser
- Mark up a diagram with arrows and labels the class can see live
- Leave numbered comment pins on a photo for a follow-up writing task
Drawing in Read-Only Mode & Homework: Students can draw freehand lines and drop comment pins on pictures even when the lesson document itself is read-only (such as during homework assignments or when the teacher has locked document editing). During a timed exam or exam lockdown, student drawing and annotation are locked.
Managing Marks and Notes
- Deleting notes and drawn lines: Teachers and school administrators can delete any note and any drawn line carrying a note created by any participant in a lesson. Students can delete only their own marks. Editing the text of a note remains restricted to its original author.
- Copy/paste across lessons: When you copy a picture or image slider and paste it into another lesson, all marks drawn on it travel with the pasted copy.
- Duplicating inside the same lesson: When you duplicate a step or paste blocks inside the same lesson, the new copy gets fresh widget IDs with all student answers and correction markers cleared (and any Individual Work block reset to unstarted), while keeping your drawn image marks and whiteboard diagrams intact.
Image Slider
An Image Slider allows you to showcase a carousel of multiple pictures within a single compact block.
During live sessions and homework, every slide in an Image Slider supports full real-time collaboration:
- Collaborative Drawing: Teachers and students can draw freehand strokes across any slide in the carousel (including in read-only mode and homework; locked during timed exams).
- Shared Laser Pointer: Point at details with the real-time fading laser pointer across individual slides.
- Numbered Comment Pins: Drop numbered pins on specific parts of a slide to attach discussion notes and questions.
Annotations persist on their respective slides as you navigate back and forth through the carousel. When copied into another lesson, drawn marks travel with the slider; duplicating inside the same lesson clears student answers while preserving your drawn marks.
Expandable Images (/expandableimages)
The Expandable Images block lets you display a prominent primary hero image while keeping supplementary photos tucked away until requested:
- Hero & Toggle: Shows the main hero picture followed by a clean Show N more images / Hide additional images toggle button.
- Image Management Toolbar: Selecting the block reveals an action bar with tools to:
- Add images: Upload or link additional images to the collection.
- Manage images: View and reorganize the image queue.
- Move image up / down: Reorder images within the gallery.
- Replace image: Swap out an existing photo while keeping its position.
- Remove image: Delete an image from the set.
Type /expandableimages or select Expandable Images from the / insert menu.
Audio
Inserting Audio Files
Open Audio Insert
Click Insert Audio in the toolbar or type /audio.
Choose Method
- Upload: select an audio file (MP3, WAV, M4A, WebM)
- Record: record audio directly in the browser using your microphone
- URL: link to an externally hosted audio file
Configure
- Title: a name for the audio clip (e.g., "Dialogue at the Airport")
- Transcript: add a text transcript (recommended for accessibility)
- Transcript visibility: choose how students see the transcript — hidden (never shown), after listening (appears after the student plays the audio), or always visible
Insert
The audio player block appears in the lesson.
Audio Player Features
The audio player displayed to students includes:
- Play/pause button
- Progress bar with scrubbing
- Playback speed adjustment (0.5x, 0.75x, 1x, 1.25x, 1.5x)
- Transcript toggle (if transcript was provided)
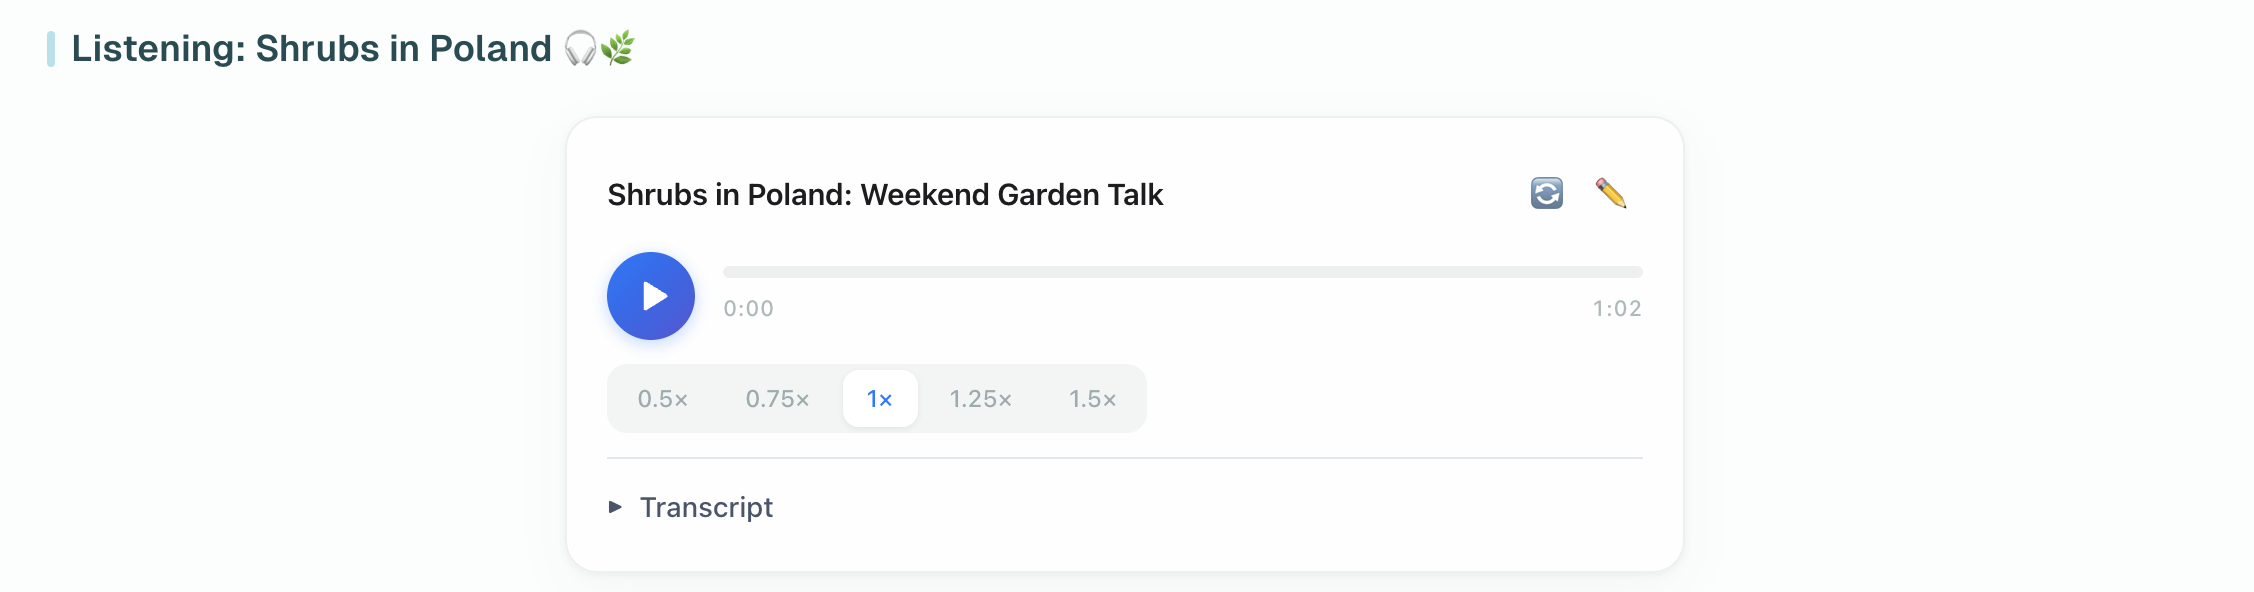
For listening comprehension exercises, set the transcript to "after-listen" mode. Students will not see the text until they have listened at least once, encouraging genuine listening practice.
Exam-Style Audio
Listening exam tasks can use a compact audio player with stricter controls:
- Limited plays — the player shows how many listens remain.
- No rewind — students cannot scrub back to repeat a fragment.
- Hidden transcript — the transcript stays hidden for controlled listening tasks.
- Built-in pauses — generated exam audio can include silent preparation time.

Use this when the listening task should feel closer to a real exam. For regular lessons, keep the standard audio player so students can replay and review freely.
Live Session Playback Sync
During a live session, the teacher has full control over audio playback for all connected students. When the teacher plays, pauses, seeks, or changes the playback speed, the action is instantly mirrored on every student's player.
- Play / Pause -- teacher presses play or pause and all students follow
- Seek -- teacher scrubs to a specific timestamp and all students jump to the same position
- Playback speed -- teacher switches to 0.75x or 1.25x and all students hear the same speed
Students' speed controls are disabled during a live session so they cannot override the teacher's choice. Outside of live sessions, students control their own playback freely.
Sync is one-way: the teacher commands, students follow. There is no noticeable delay, and playback stays in sync smoothly.
Floating Media Capsule
When you play an audio or video clip and scroll away through the lesson, a Floating Media Capsule docks below the top bar so you never lose control of active playback:
- Play / Pause: Toggle playback without scrolling back to the media block.
- Time Display: Displays current playback position and total track duration.
- Draggable Seek Scrubber: Drag to jump directly to any position in the track (seeking is disabled in no-rewind lockdown exams).
- Go to player: Click the scroll button to jump your screen directly back to the original media player block.
- Hide: Dismiss the floating capsule if you prefer an unobstructed view of the lesson text.
Video
Inserting Video Files
Open Video Insert
Click Insert Video in the toolbar or type /video.
Choose Method
- Upload: select a video file from your computer (MP4, WebM, OGG, MOV -- max 60 MB)
- URL: paste a direct URL to a video file hosted elsewhere
Insert
The video player block appears in the lesson with standard browser playback controls (play/pause, seek, volume, fullscreen, speed).
Videos Larger Than 60 MB: Google Drive Guide
When you select a video file larger than 60 MB, the upload dialog displays:
"The file is too large (75 MB). You can upload a file up to 60 MB."
Below the message, step-by-step instructions explain how to share large videos via Google Drive:
- Upload the video to Google Drive.
- Share the file with anyone who has the link.
- Copy the link to the file.
- Click “Paste link” and paste the link.
Clicking the "Paste link" button right inside the prompt switches the dialog directly to URL mode so you can paste the link immediately.
Resizing
Click the video to select it. Drag the corner handles to resize proportionally. The maximum resolution is 1920 x 1080.
This ensures that the entire class watches the same moment at the same time. Note: Video sync works identically to audio sync (see Live Session Playback Sync in the Audio section).
Each video block in a lesson is controlled independently. If a lesson contains multiple videos, playing one does not affect the others.
YouTube Videos
Embedding YouTube
Open the Embed
Type /youtube or click the video button in the toolbar.
Paste the URL
Paste a full YouTube URL (e.g., https://www.youtube.com/watch?v=...) or a shortened youtu.be link.
Configure
- Size: the video embeds at a responsive width by default
Insert
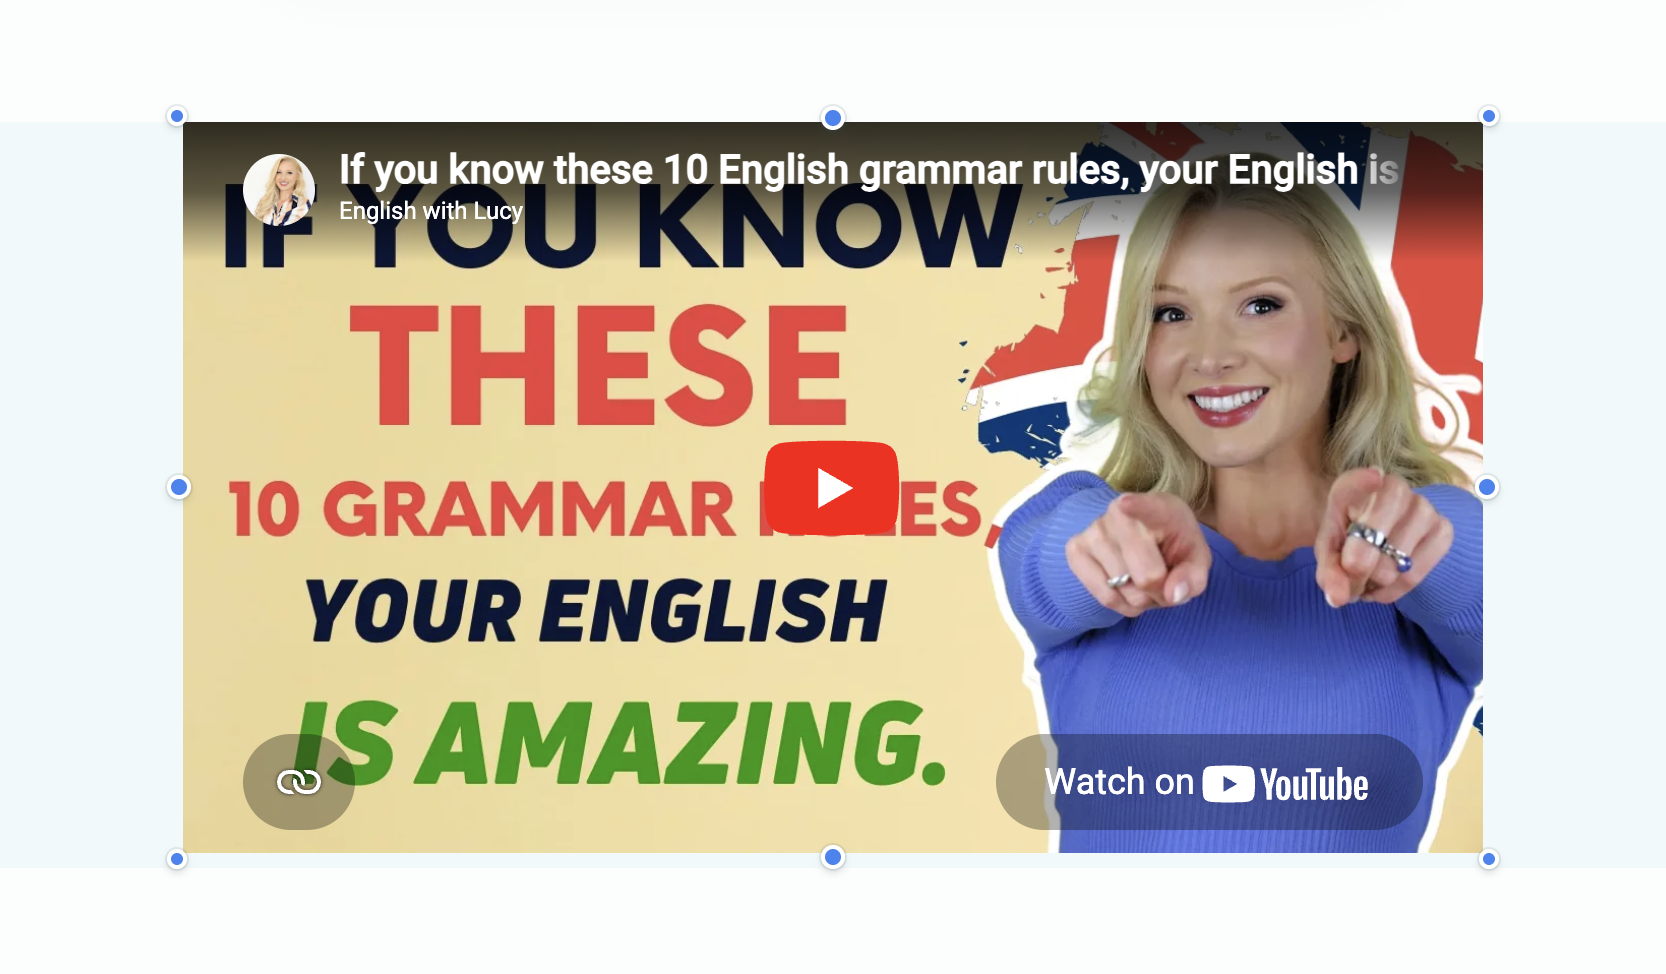
The YouTube player appears embedded directly in the lesson.
Students can watch the video without leaving the lesson page. Controls are handled by the standard YouTube player. When embedded on collaborative whiteboard canvases, YouTube player controls automatically counter-scale to stay at sharp, human-readable size regardless of your canvas zoom level.
Whiteboard (/whiteboard)
Insert a collaborative Whiteboard block by typing /whiteboard or selecting Whiteboard under the Media category in the Lesson blocks drawer.
When using Whiteboards in lessons:
- Miro Vector / SVG Import Preservation: Percent-encoded SVG vectors exported from Miro boards are fully preserved on import, retaining crisp vector curves, illustrations, and formulas without distortion.
- Escape Key Safety: Pressing the Escape key while sketching or manipulating shapes inside the whiteboard modal is safely consumed by the canvas rather than closing the window, protecting your in-progress drawings from accidental loss. Only clicking the outer backdrop or cancel button prompts a discard confirmation.
For a full-screen, classroom-wide collaborative whiteboard with student management, timer, student picker, and live widget staging, see The Lesson Board.
Twitter / Social Media Embeds
You can embed tweets and social media posts directly into lessons. This is useful for:
- Showing authentic language use in social media
- Discussing cultural content
- Analyzing informal or colloquial language
Type /twitter or paste a tweet URL. The editor will detect and embed it automatically.
External Interactive Widgets
You can embed external interactive exercises and games directly into lessons from popular educational platforms. This is useful for:
- Integrating existing WordWall activities or Kahoot quizzes
- Creating varied, interactive homework assignments
- Using flashcards from services like Quizlet
Type /embed or click the embed button in the toolbar, then select the service you want to embed. You can also paste a URL directly (see Auto-Embed below).
Auto-Embed Detection
The editor has an auto-embed system that detects URLs for supported services. When you paste a URL on its own line, the editor automatically offers to convert it into a rich embed for:
- YouTube videos
- Twitter/X posts
- Educational widgets (WordWall, Kahoot, Quizlet, etc.)
- Other supported platforms
Frequently Asked Questions
What image formats are supported?
JPEG, PNG, WebP, and GIF are supported. WebP is recommended for the best balance of quality and file size.
Is there a file size limit for uploads?
Images should be kept under 2 MB for optimal performance. Audio files can be up to 50 MB. Video files can be uploaded directly up to 60 MB, or linked from Google Drive or YouTube for larger files.
Can I record audio directly in the editor?
Yes. The audio upload dialog includes a recording option that uses your browser microphone. Grant microphone permission when prompted.
Can I embed Vimeo or other video platforms?
Currently, YouTube is the primary supported video platform. For other services, you can link to the video URL, but rich embedding is not guaranteed.