Running Live Sessions
Join the session, welcome students, teach with lesson content, and use the live tools effectively.
Who this is for
Teachers who are about to start or are already inside a live lesson.
What this page answers
- How should I start the session cleanly?
- What tools matter during the lesson?
- What is different in group sessions?
Prerequisites
- a scheduled session with students attached, or any lesson (not marked as Exam Mode) started with Start instant lesson
Two ways a live session runs
A live session runs differently depending on whether it is individual or group. The shapes below show both before the step-by-step.
Color key (both diagrams): purple = a decision · blue = a step or waiting state · orange = an action you take · green = live / completed · red = an end with no charge.
Individual live lesson. The student waits at a gate until you start; cancelling never charges the student.
Group live lesson. You start first; students who join are marked present, and only present students are charged when you end the session.
Who gets charged in a group session? Only the students you confirm as present when you end the session. A student you mark absent — or who never joins — is not charged. You decide attendance at the end, so a no-show never costs anyone.
1. Join early
Open the session before class starts so you can:
- confirm camera and microphone access
- check your lesson content
- verify the correct audio output and input devices
- check the lesson has no unpublished changes waiting
An amber asterisk beside a lesson on the course list means someone edited it and never published the edit — so the version you are about to teach is the older one. Publish it before class, not during. See Working copies.
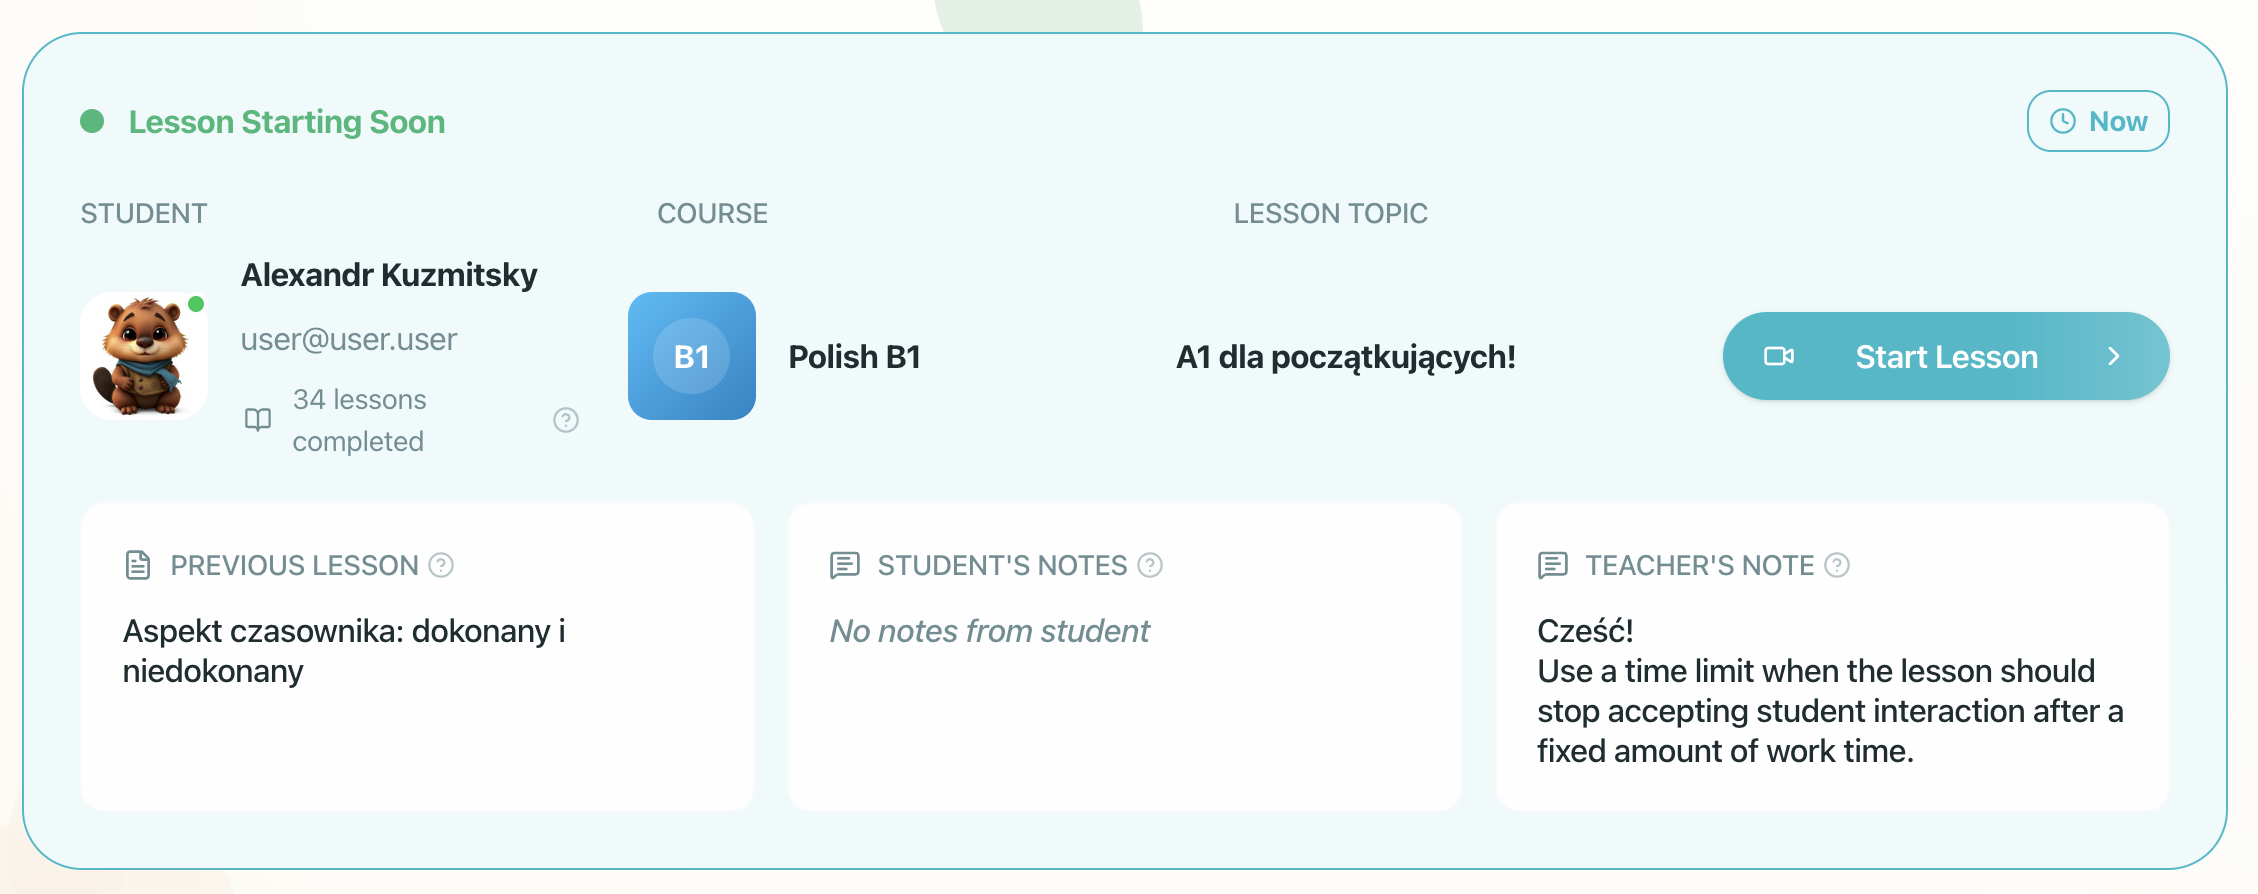
The "Lesson Starting Soon" banner on the Dashboard shows you and the student all key details — including any assignment note you wrote when scheduling the lesson. Use this to remind yourself and the student of the planned focus for the session.
The banner also shows the Previous Lesson as a clickable link to review or continue the previous session.
Course-Update Sync Banner
A class lesson automatically follows updates published to its source course lesson until a teacher edits the lesson inside the class room or starts the lesson. It synchronizes automatically when the room first loads or on Start lesson.
If a new version of the course lesson is published after the class room copy was already created or edited (and before the lesson starts):
- A prominent notice banner appears at the top of the live room (and in the Class Lesson Panel): "This lesson's material was updated in the course."
- Click "Load the new version".
- A confirmation dialog asks: "Refresh this assigned lesson?" Click "Refresh lesson" to load the latest published course material for the entire class.
Audio presets and automatic reconnection
A few things are tuned automatically so neither you nor your student has to think about them:
- Echo cancellation is on in every audio preset — so speakers, laptop mics, AirPods, and headsets all produce clean audio without feedback loops.
- Default preset leaves noise suppression OFF — so language pronunciation, quiet vowel sounds, and subtle phonetics are never clipped or muffled. Echo cancellation stays on.
- Noisy room preset and AI Noise Suppression are opt-in — for loud environments, open in-call audio settings to choose the Noisy preset or nudge the AI Noise Suppression slider up; changes apply to the live audio track immediately.
- Automatic reconnection and stream republication — if a participant's Wi-Fi drops briefly, the live room automatically reconnects and republishes their microphone and camera feeds upon reconnecting without needing to toggle buttons or refresh the page.
- Participant join chime — when a student joins an ongoing session, a short three-note chime plays so you do not have to watch the participant list. The first two seconds after you connect are silent, so the chime never fires for people already in the room.
Camera & Microphone Permission Recovery Guides
If your browser or operating system blocks access to your camera or microphone when joining or during a session, Locuto displays an in-call step-by-step unblock card:
- Enlargeable visual guides: Clear, step-by-step illustrations walk you through enabling media permissions in Chrome (desktop and Android), Safari (macOS and iOS), and system settings. Tap any guide picture to enlarge it.
- Check again: Once you update browser or system settings, click Check again to verify media access immediately without reloading the live classroom.
- Hide / Show the guide: Dismiss the guide card if you want to inspect lesson materials first, or toggle it back open whenever you are ready to adjust permissions.
2. Start the session deliberately
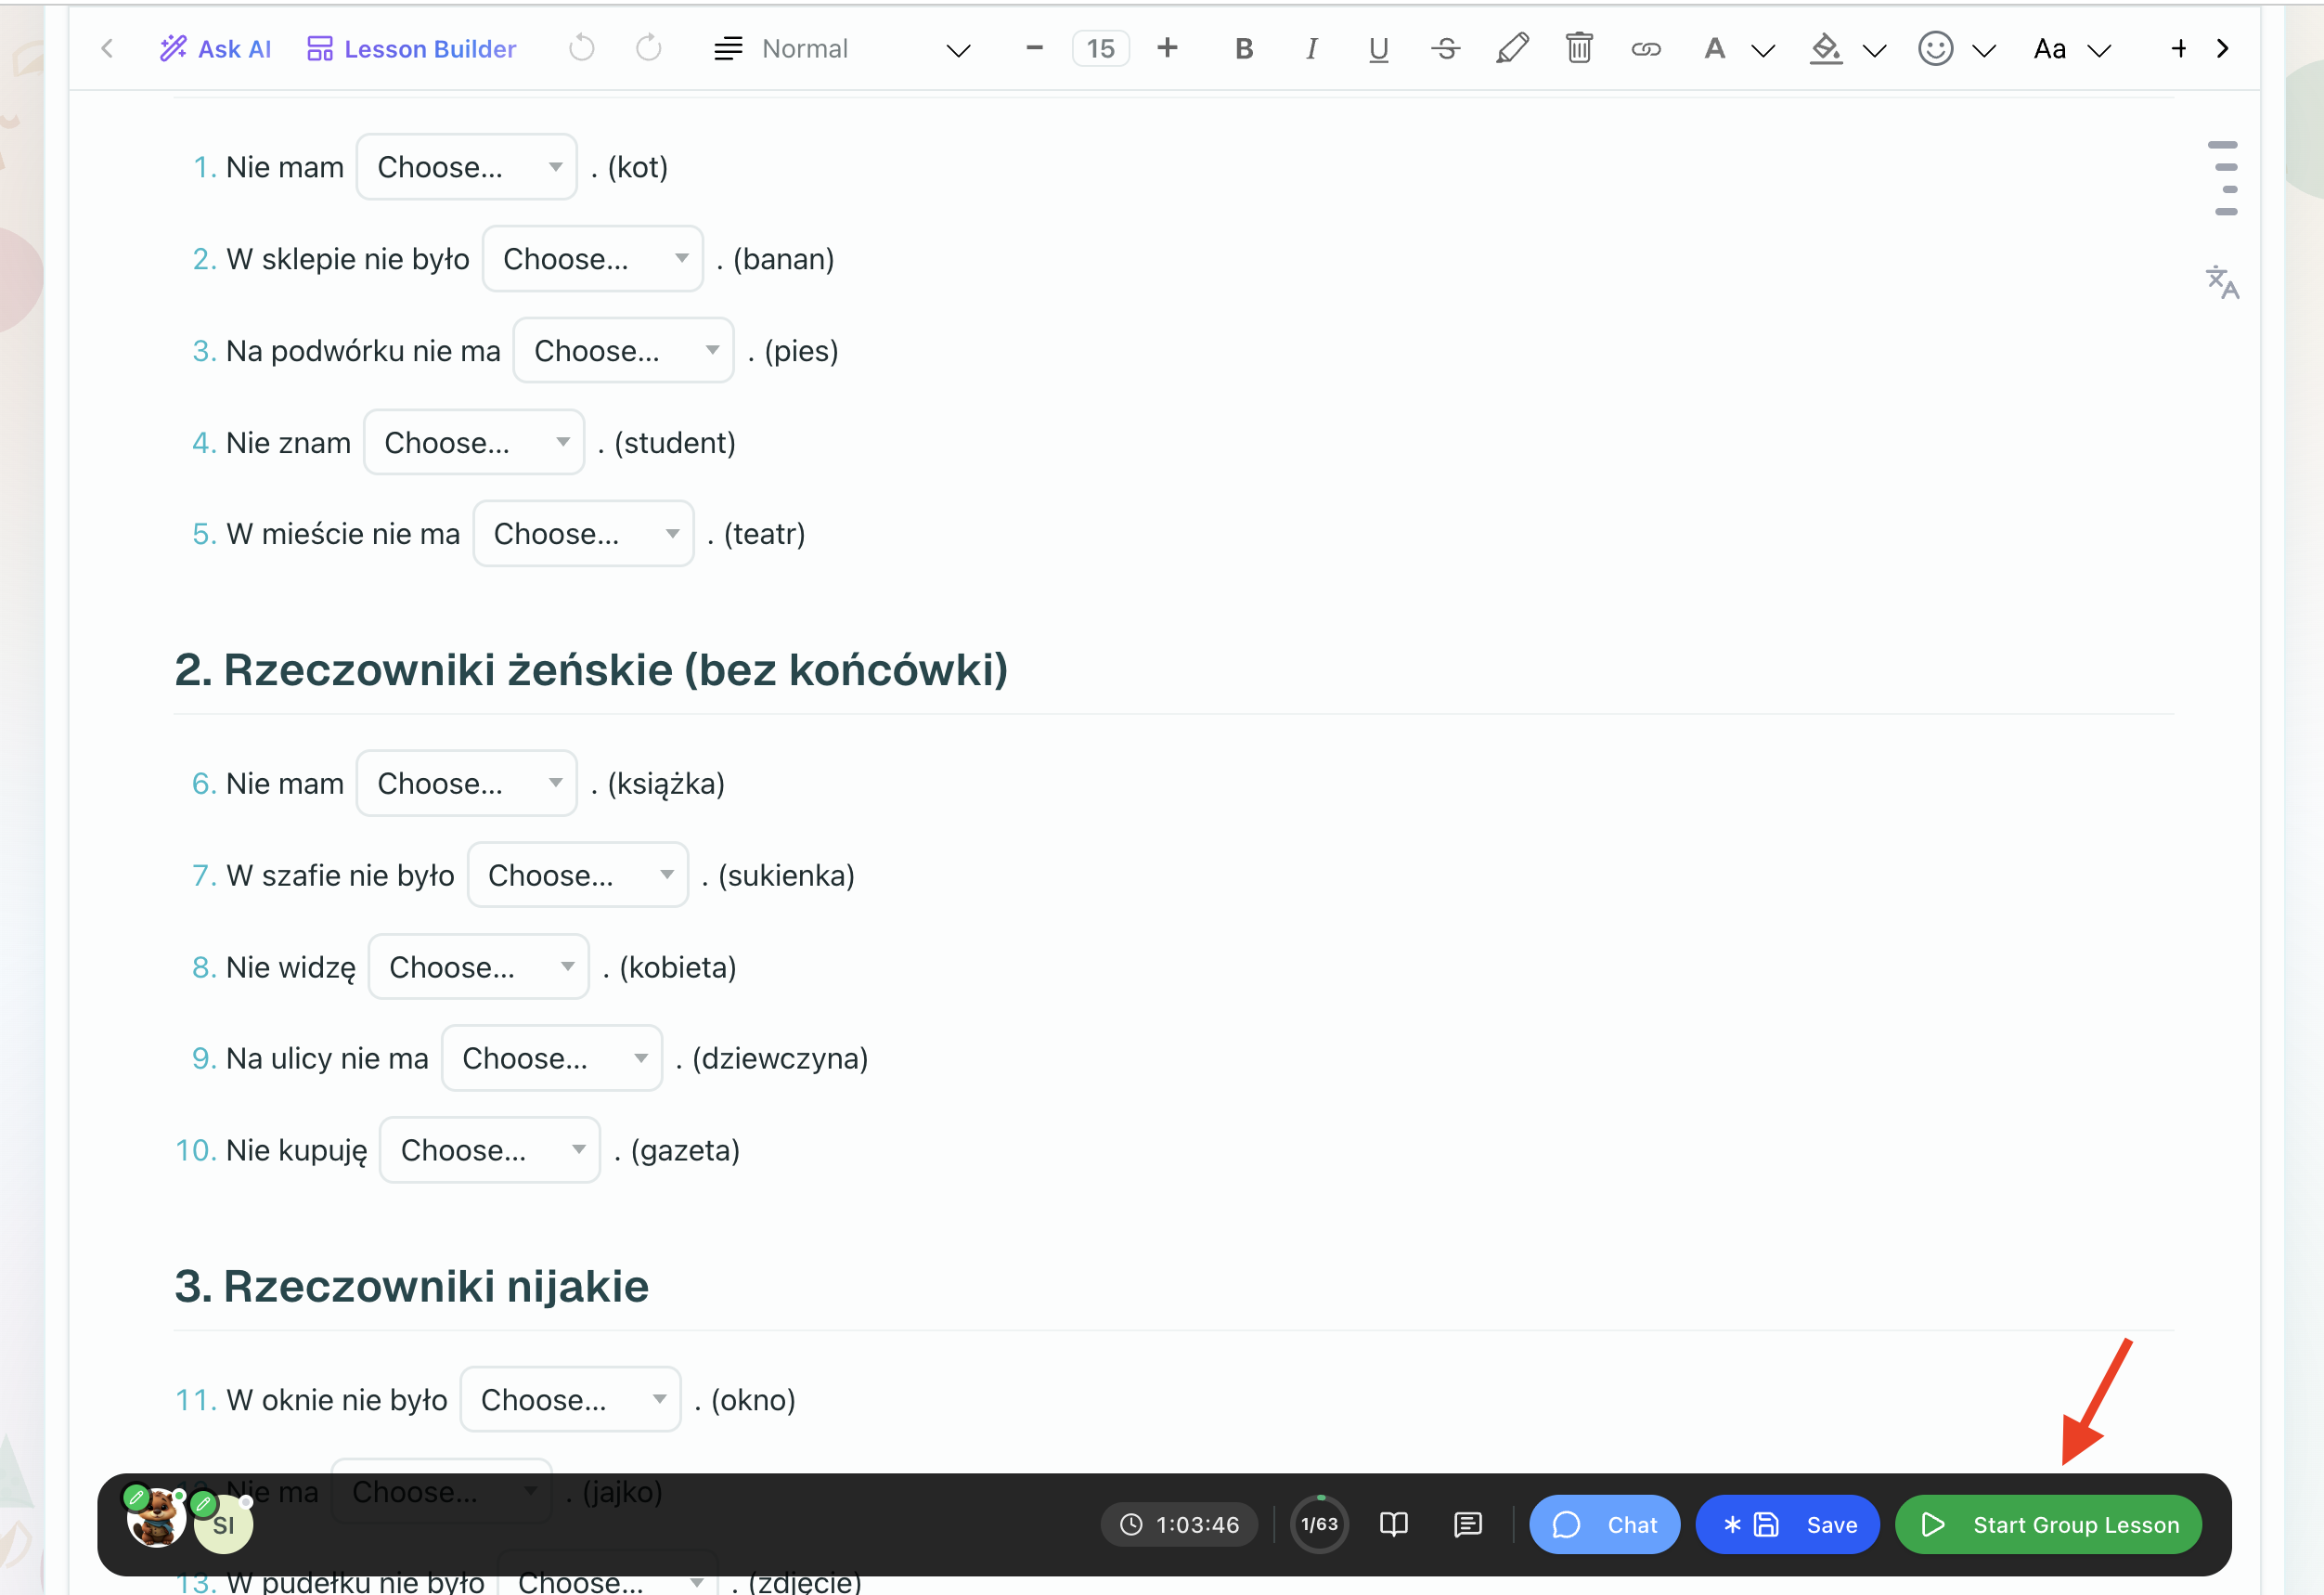
For group sessions, wait until you are ready and then start the group lesson. For individual sessions, move straight into the teaching flow once both sides are present. An unscheduled lesson opens directly into the same teaching flow; it simply has no calendar appointment attached to it.
The class Start button on the lesson dock is styled in call-accept green (and pulses when students are waiting).
Pre-Start Camera Window (5 Minutes Before Class)
Beginning 5 minutes before a scheduled class start time (before the teacher clicks Start), the pre-start camera window becomes available:
- For Students: In the waiting overlay, students can click "Enter room" to open a local camera preview with a "Waiting for your teacher" badge so they can check their video before class begins. The moment the teacher clicks Start lesson, students who have their camera preview open are automatically joined into the live call without an extra confirmation dialog or join prompt (if a student closed the preview beforehand, they see the standard Join lesson prompt when class starts).
- For Teachers: Opening the room during the 5-minute pre-start window automatically opens the video call preview with a semi-transparent green Play button ("Start lesson") centered over the teacher's camera view (20% see-through so your own camera preview remains visible underneath). Clicking that Play button starts the class immediately without reconnecting; if you close the video preview, you can still start the class from the green Start button on the lesson dock.
Starting Empty Class Rooms
Teachers can open a scheduled class room and click Start lesson even before any student or guest arrives. Starting an empty room immediately loads the class snapshot, activates the live whiteboard and document state, and enables sharing the permanent live link and 6-digit Class PIN with late arrivals.
Platform Video Call Toggle & External Meeting Links
When a class has "Video call on the platform" turned OFF in Class settings:
- Interactive tools stay active: The shared lesson document, exercises, Lesson Board, drawing tools, and live examiner continue to work normally, and clicking Start lesson still records attendance.
- No built-in camera preview: The live room does not activate webcam or microphone feeds.
- Adjusted capabilities: Breakout rooms are hidden, and AI audio lesson summaries are disabled ("The lesson summary works only with the video call on the platform.").
- External Video Call Button: If you entered an external video link in Class settings, the green phone button on the live room's bottom dock becomes an "Open video call" button (displaying a Google Meet or Zoom badge when applicable) that opens the external call in a new browser tab.
Session Time Tracking & Auto-Stop
The room timer adapts intelligently to your actual teaching start:
- Actual-Start Anchoring: The session timer begins counting from the moment you actually click "Start lesson", rather than the calendar appointment time. If a 60-minute lesson scheduled for 10:00 starts at 10:05, the timer counts from 10:05, ensuring your students receive their full allocated lesson time.
- Pre-Start Countdown: Before you start the lesson, the timer displays a calm countdown to the scheduled start ("Starts in X min").
- Completion Freeze: When you end the lesson, the timer freezes at the conclusion time, preventing runaway overtime displays.
What a waiting student sees (Chat-First Waiting Room)
When students arrive before the teacher starts the live session, they enter a redesigned chat-first waiting room:
- Peer Chat & Warm-Up: Students can introduce themselves, exchange text messages with classmates, and review lesson objectives before the teacher opens the room.
- Calm Status Indicators: Clear visual indicators reassure students that their audio and video devices are ready.
- Automatic Entry: When the teacher clicks "Start lesson", the waiting room transitions automatically into the live classroom without requiring a page reload.
Permanent Class Live Links & In-Room Invites
Joining scheduled group sessions uses your class's Permanent Live Link and persistent 6-digit PIN:
- One Link for the Whole Semester: Your class owns a single permanent URL that never changes between meetings, available in your class Joining lessons side card or Students tab. Students can bookmark the link once and use it for every weekly class.
- Enrolled Students Enter Directly: Students on the class roster who are signed into their school account enter the live classroom directly without ever entering a PIN.
- Guests & Drop-Ins Use 6-Digit PIN: External students, trial attendees, or guests joining without an account enter their name and the class's 6-digit PIN. Upon entering, their browser receives a 30-day class pass so they do not have to type the PIN again on future visits from the same device.
- Early Arrival Waiting Room: The link opens 15 minutes before scheduled class start. Students arriving early enter the chat-first waiting room, where a countdown timer automatically transitions them into the live classroom when class begins without reloading the page.
- Double Periods & Multiple Sessions: If a class has consecutive or overlapping sessions, the permanent link automatically opens the most recently started session.
- Ad-Hoc In-Room Meeting Invites: For spontaneous drop-ins during an ongoing lesson, teachers can also share an instant in-room meeting link with an ephemeral 4-digit PIN generated directly from the room controls.

Contextual links in the header
The live session header provides quick links to the associated Enrollment, Class, and Course. This allows teachers, Operations admins, and Owners to easily navigate to the broader context of the student's learning path directly from the live room.
3. Review assigned tasks
The live session header shows an Assignments card split into two columns:
- Previous Lesson — lessons assigned for the current class, such as homework the student should have completed before this session
- Next Lesson — lessons that will be assigned after the current class
Each lesson appears as a pill with an icon. In group sessions, student avatars appear on each pill. Lists longer than 3 items are collapsed with a "Show more" toggle.
You can edit assignments directly during the live lesson. Action buttons are aligned to the right for quick access, allowing you to easily adjust or cancel homework on the fly based on the student's performance during the session.

Attendance in Group Lessons & Late Presence Resolution
When students join a group live lesson, Locuto marks them present automatically as soon as they enter the live room. At the end of the session, the teacher confirms attendance: students confirmed present are marked as Passed, while students who did not attend are marked as Absent / Canceled without charge.
Late Presence Resolution (Post-Session Arrivals)
If a student enters the live room just as or after the teacher ends the group session, a Late Presence Discrepancy is logged and an amber review badge appears on the lesson card. The teacher can resolve this directly from the lesson review popover:
- Mark present: Acknowledges the late arrival, sets group attendance as confirmed, and transitions the student's lesson from Absent to Passed (making them eligible for certificates).
- Keep absent: Leaves the lesson as Absent / Canceled and records a mandatory reason.
Attendance Resolution Never Moves Money: Resolving late presence updates academic attendance and lesson outcome only. It never triggers automatic balance debits, ledger adjustments, or credit deductions. If the school wishes to apply a financial charge, an administrator must record an explicit accounting adjustment under Accounting.
Individual 1:1 Attendance vs Group Confirmation
In 1:1 lessons, student attendance is determined strictly by the student's room entry timestamp. Individual lessons do not use group presence reconciliation, and lesson completion billing remains an explicit teacher decision upon finishing the session.
Student Balances & Room Access
An outstanding student tuition balance is informational and never blocks a student from joining a scheduled class or entering the live video room. Classroom learning continues uninterrupted unless staff explicitly deactivate the student's enrollment.
4. Use the lesson as the session spine
Most live sessions work best when the lesson content drives the flow:
- introduce the topic
- work through explanations or examples
- complete exercises together
- use chat or audio/video discussion when needed
Running Individual Work in Group Classes
When teaching a group class, you can insert an Individual work block into the lesson so students solve tasks privately before group discussion:
- Starting the Task: Before starting, view the waiting student count on the block and click Start. The platform creates a private copy of the task for every student in the room. Late joiners receive a copy automatically the moment they arrive.
- Private Peek Mode & Student Switcher: Use the student switcher dropdown (
Task · 4 copies, grouped into In the room, Not in the room, and Removed, each showing live progress counters) or use the‹/›arrows to inspect any student's copy. A dashed amber border with the badge "The class does not see this" confirms you are in private Peek mode. While peeking, you can monitor student typing in real time and add private hints or corrections directly into their copy. - Show to Class (Spotlight): When a student produces an interesting answer or needs class feedback, click Show to class. The student's work is spotlighted across everyone's screen inside a high-contrast frame (accompanied by a floating top capsule if students scroll away). During Show to class, only the teacher and the work's author can edit while all classmates view in read-only mode. Click Stop showing to return every student to their own saved work.
- Resetting with Start Again: If you want to issue an updated prompt or wipe answers for a fresh attempt, open
⋯→ Start again for everyone. If any students have already answered, the platform presents a confirmation challenge before resetting all copies. - Layout Safeguards: Once started, an Individual work block (and any Step or slide containing it) is strictly locked against drag reordering and block-gutter deletion to protect active student input.
Switch lesson material during a live session
Sometimes the scheduled lesson is not the right material once the session starts. Open the More actions (⋯) menu in the live session header and select Lesson Library to open another lesson without leaving the call.
- Open the More actions menu and click Lesson Library.
- Change the status filter to All if the lesson is not visible.
- Find the lesson you want to use.
- Click Switch to this lesson.
Locuto.PRO switches the displayed lesson while keeping the same live-session context. In a group session, collaboration follows the selected lesson: each lesson has its own shared editing state, so switching does not merge the selected lesson with the lesson you started from. Students continue to see the lesson context selected for the group, and their own assigned copies remain separate from other students' copies.
Use Return to session lesson when you want to clear the override and show the originally scheduled lesson again.
This is also useful for homework review. In a 1:1 lesson, open the student's submitted or previous homework and review it together inside the same call. In a group lesson, the teacher can use the participants' previous and assigned materials to open an individual student's homework copy when that student's work needs attention, while still keeping the group session context.

Use prepared Whiteboards during the lesson
A lesson can include more than one Whiteboard block. This lets the teacher prepare several visual workspaces before class: for example, a grammar diagram, a process scheme, a vocabulary mind map, and a blank board for live problem solving.
During the live session, open the Whiteboard block you want to work with. Locuto.PRO automatically opens the same board for students, so the class stays on the same diagram without asking students to scroll or find the right place manually.
Use separate boards when each stage of the lesson needs its own visual context. Use image annotation tools instead when you only need to point at or mark a specific picture.
Present the lesson slide by slide
If the lesson is prepared with level-1 headings (# ) or page breaks, use Presentation Mode during the live session to show the material as slides instead of a long scrolling document. In live sessions, open the live dock's Tools menu and select Presentation under the View section. The teacher controls navigation with the arrows, Space, floating pager dock, or the section navigation rail.
When the teacher switches slides, students see the same slide automatically. In the Presentation rail header, the "The class follows your slide" toggle button (Users icon) controls classroom synchronization:
- Following enabled (default): As you advance or jump between slides, every student's screen transitions to match your slide in real time.
- Following disabled: Students can browse slides independently at their own pace for freer practice. Focus summons (such as double-clicking a block drag handle or activating Show to class) still bring all students back to your active slide immediately.
Teachers can access recording controls, Ask AI insertion on the active slide, and completion verdicts directly from within the running deck.
Control what students see in the lesson document
When you teach in the normal lesson document view, you can still guide student attention without switching to Presentation Mode.
- Click an item in the lesson Table of Contents to scroll the teacher and all students to that section.
- Double-click a block's drag handle to scroll everyone to that exact block and briefly highlight it.
Use the Table of Contents for larger section jumps, such as moving from explanation to practice. Use the block drag handle when you need a precise focus point, such as one exercise, image, paragraph, or widget.


Show Audio Transcript to Students
On audio blocks during a live session, the teacher has an immediate Show to students / Hide from students button beside the transcript expander arrow:
- Clicking Show to students immediately reveals and expands the full transcript across all student screens, overriding any default "after listening" or "hidden" visibility rule for that moment.
- Clicking Hide from students collapses the transcript and restores the authored visibility rule.
Live Class Vocabulary Sharing ("For students")
When reading texts or discussing vocabulary during a live session, teachers can push new words directly to the whole class:
- Select any word or phrase in the lesson text.
- The translation card opens with definitions and audio pronunciation.
- Click "For students" (without a student count). Teachers can click "For students" even without typing a custom translation so each student receives the dictionary translation in their own native language.
- The term is immediately added to every student's personal dictionary, and an animated "New word" card with audio plays at the top of every student's screen.
Send Picked Blocks Home as Homework
The Homework card in the left rail allows teachers to quickly assign specific sections of the active lesson:
- At rest, the block homework card displays a clean "Choose blocks" row. Click Choose blocks (the prompt "Click the blocks in the lesson." then appears).
- Click individual blocks or drag across a range of blocks or Steps in the lesson gutter to select them.
- Click Send to dispatch the selected blocks as clean homework to the class, choosing either With teacher review (with a deadline) or Without teacher review (self-study practice).
- Alternatively, click Copy to copy the selected blocks to your clipboard with answers included for lesson planning.
Editing during a live session
When you need to make changes to the lesson material or add notes during a live session, you have access to the floating "Pill" toolbar. For teachers, this expanding capsule reveals the full set of rich text and formatting tools, replacing the classic horizontal toolbar. This modern interface keeps your tools within reach without cluttering the screen or disrupting the video call layout.
Additionally, as you scroll down the document, the lesson cover and title shrink into a pinned, compact header to maximize your teaching space.
Global undo for student edits
In collaborative live sessions where students have edit permissions, accidental edits or deletions can occur. Teachers have Global Student Undo authority: you can roll back student edits across the shared document without breaking your own local typing undo history.
Restore an earlier version of the lesson document
If something in the shared document goes wrong mid-class — a Step or content block deleted by accident, a widget wrecked by a stray paste — you can put it back without leaving the lesson. Open the Reload menu in the collaboration overlay and choose a saved point. Everyone using that lesson sees the restored content, so tell the class what you are doing before you restore it.
See Snapshots for how the saved points work and who is allowed to restore one.
5. Use in-session tools effectively
The main live-session tools are:
- "Notes" pill (Teaching Observations) — positioned first on the live dock as a prominent filled pill displaying a notebook-with-pen icon, the text label "Notes", and a count badge for existing notes (collapsing to an icon pill on narrow mobile screens). In 1:1 lessons, quickly type private notes attached to the lesson. In group classes, an accordion lists every student with their avatar so you can record individual notes without leaving the room. The text input includes a round Send button inside the bottom-right corner of the text field to save observations instantly. Notes store confidential teaching observations visible strictly to school staff. See Teaching Observations.
- Consolidated "Tools" menu — secondary controls and viewing options are grouped into a single Tools button on the live dock. At the top, a dedicated "View" section houses a full-width Lesson / Canvas segmented switch and a labeled Presentation row (moving these view options off the main dock bar during live calls). The menu also houses editor toolbar toggles, sound effects, drawing tools, and account AI balance. The panel opens exclusively on an intentional click or tap (never on hover or keyboard navigation), preventing accidental popups while drawing or teaching.
- Unified live room document — student work and teacher annotations live in a single unified document. When a student begins an exercise or writes on a slide, their live work is visible immediately to the teacher, and teacher corrections attach directly to that same document, ensuring student effort and teacher feedback never diverge.
- Student Screen Sharing — teachers can grant permission for individual students to share their screen during live calls, enabling interactive presentations, homework walkthroughs, or code reviews.
- Interactive Teaching Clock — an interactive analog and digital clock widget available in the lesson toolbar. Teachers and students can drag clock hands to practice telling time collaboratively during math and language lessons.
- Removing a participant — if a participant is disruptive, the teacher can remove them from the session. Removal is terminal for that session: the student cannot rejoin that specific live class via link or refresh.
- AI transcription buffer — starting live AI transcription requires at least 50 AI Credits in your school account. If the balance falls below 50, new live transcripts will not start until credits are replenished.
- Redesigned chat panel — a calm messenger layout with grouped sender bubbles, verified Teacher and Student role badges, day dividers, clickable URL toasts, a jump-to-latest scroll pill, and a full-screen drawer on mobile. Sent messages appear instantly with zero lag.
- Waiting student alerts — if students arrive early to a group class, the platform sends instant notifications to the teacher anywhere on the platform, linking directly to the room.
- Synced media playback — shared audio and video controllers.
- Call connection quality indicators — live latency and connection strength indicators on participant video tiles.
- Presence logging without video — live sessions conducted without video (e.g. whiteboard or companion mode) still record participant attendance and timestamps in session logs.
- Student participant details and rewards — award praise stickers and badges from the participant popover. Multiple awards queue smoothly in the reward tray so celebratory animations are never interrupted.
The video track supports an on-demand background blur that runs locally on your machine and adapts its frame rate on slower devices so it never freezes the call. Toggle it from the in-call controls.
Floating Video Call & Phone Mini-Window
The live video call interface adapts to your device:
- Desktop & Tablet: A resizable floating window that you can drag and position anywhere across the lesson canvas without blocking active exercises.
- Draggable 16:9 Phone Mini-Window: On mobile phones, video renders in a compact 16:9 floating mini-window. It snaps cleanly to screen corners, automatically jumps out of the way when the on-screen keyboard opens, can be resized with a two-finger pinch gesture (between 112 px and 70% of the screen's short side), and can be collapsed into a slim status pill displaying Show video, End, or Reconnect. Tapping the mini-window opens the full-screen Call Stage.
Full-Screen Call Stage, Speaker View & Screen Share Strip
When visual conversation takes priority, expand into the Call Stage:
- Speaker View: In sessions with 3 or more participants, or whenever someone shares their screen, Speaker View activates automatically. The active speaker or shared screen takes the main stage, while participants appear in a tidy side or bottom strip.
- Local Pinning: Tap any participant's video tile in the strip to pin or unpin them on your screen. Pinning is local to your view and does not force other participants' layouts to change.
- Screen Share Participant Strip: In floating window mode, a compact participant strip sits neatly underneath the shared screen presentation.
- Camera-Off Avatars: Participants with cameras turned off display high-contrast avatar graphics or initials so speaker identity remains clear.
Class Chat in the Live Dock
Click the chat icon on the live dock to open the persistent Class Chat:
- Persistent Conversation: Class discussions, shared links, and notes persist between sessions, so students and teachers can review previous messages anytime.
- Rich Interaction: Includes
@mentions, emoji reactions, uploading up to 4 private photos per message, and online member status indicator dots. - Posting Permissions: Teachers can toggle between Everyone writes and Only staff writes modes to maintain order during focused instruction.
- Meeting Guest Privacy: Guests joining spontaneous sessions via PIN see only messages sent during that active meeting, keeping broader class history private.
Live Lesson Laser Pointer & Persistent Sticky Notes
In the top-right live tools strip (located directly above the Board pill), teachers have access to real-time guidance tools:
- Shared Laser Pointer (Use pointer / Stop pointer): Emits a smooth sky-blue laser trail and click ripple across all student screens without scrolling their view. A Pointer visibility (
ⓘ) indicator shows whether any student's layout is still catching up. - Persistent Sticky Notes (Add sticky note): Places a draggable, color-customizable sticky note directly on the lesson document. The note saves with the document across reloads and appears read-only (Teacher note) to students.
The Lesson Board
Teachers can click the circular Lagoon Board pill (Board) in the top-right live tools strip (under the sticky-note button) to launch the full-screen collaborative Lesson Board for the whole class without cluttering the lesson document:
- Lead the Class Capsule (bottom center):
- Bring the class here: Summons all students to your exact viewport and zoom level.
- Follow me: Locks student screens to follow your pan and zoom movements. A student who pans away sees a Back to the teacher pill to rejoin.
- Pointer: Activates a shared laser pointer on the board. Clicking any exercise card highlights it with an animated ring on all student screens.
- Whole board: Automatically zooms to fit all board items on screen.
- Class timer: A butter-colored timer with 1-, 2-, and 5-minute presets, +/- 30s adjustment buttons, an optional conclusion chime, and a shared countdown pill on every screen (Pause/Resume, +1 min, Stop the timer).
- Pick a student (shown when 2 or more students are in the lesson): A rose button that cycles fairly through online students ("Every student gets a turn before anyone is picked twice"). Features Pick again, Give a sticker, and displays a "The teacher picked you." badge on the chosen student's screen.
- Class drawing lock: A padlock button ("Allow students to draw on the board" / "Stop students drawing on the board") that toggles drawing permissions for all students in the room simultaneously.
- Students in the Lesson Strip (top right beside Save and close): Displays student avatar chips showing connection status, earned lesson stickers, and drawing permissions. Click any student chip to award a praise sticker or toggle Allow drawing on the board.
- Board Toolkit & Cover Cards:
- Full suite of drawing tools: Select, Hand, Pen, Highlighter (3 nib thicknesses, 13 colors), Text, Shapes, Sticky notes (with
+handles to add adjacent notes), Pins, and Layer controls (Bring forward / Send backward). - Cover cards (under Lesson tools): Place a cover over board content that appears semi-transparent with a dashed border to the teacher ("This cover hides what lies under it from the students.") and as an opaque blue
?card to students until you click Reveal or Reveal all. - Marks for checking work (under Classroom graphics): Stamp ink marks directly onto board work: Correct (green check), Try again (red cross), Question (blue
?), Star, Heart, Look here (orange!), or Arrow.
- Full suite of drawing tools: Select, Hand, Pen, Highlighter (3 nib thicknesses, 13 colors), Text, Shapes, Sticky notes (with
- Pasting Widgets & Steps onto the Board: Copy any exercise, game, or brain-break widget, Shift-click a range of block grips in the lesson gutter, or copy whole Steps (
Ctrl+C/Cmd+C) and paste them directly onto the board. Supported widgets become live interactive cards arranged automatically in rows of three (with a Clear answers button on the selected card's action bar). You can also choose Open in the board menu to import Miro.excalidrawboards.
If the connection or document state needs attention
- Connecting means the live lesson is restoring its connection. Wait for Connected before making an important edit.
- Connection lost means the call or shared lesson state is not currently updating. Use the reconnect control and keep the lesson open while it catches up.
- If a conflict or restore notice appears, pause editing and follow the notice. Review the current lesson, retry the action if offered, or use Reload to choose a saved point. Do not assume that an edit was applied until the editor shows the connected state again.
Synced Video Playback
You can collaboratively upload and play MP4 videos during a live session. When a video is played, the playback state is synchronized across all participants—if you pause to discuss a scene, it pauses for everyone. This is highly effective for interactive media activities without the lag of screen sharing.
Give rewards during the lesson
Open a student's participant popover and choose a reward such as Star, Fire, Brain, or Trophy. Rewards appear immediately in the live room and are saved with the lesson activity, so they can reinforce effort without turning every interaction into a formal grade.
Use rewards for concrete moments: a good answer, persistence after a difficult task, clear pronunciation, or helpful participation in a group class.

Session Video Recording
Teachers, Operations admins, and Owners can record the live session directly from the room. The recording captures the shared screen, lesson content, and all participant audio.
- Click the Record button in the bottom call dock (next to the screen share controls).
- The recording begins immediately. A recording indicator appears to show the session is being captured.
- When the session is finished or the recording is stopped, the file is saved automatically.
During playback, a Recording Strip will appear above the editor area. It includes a draggable player so you can review the lesson footage without blocking the lesson content. You can download or delete these session recordings later from the lesson card, the session's details page, or the Video Recordings dashboard.
Check the audio profile
Use the call controls before teaching starts:
- microphone button to mute, unmute, or choose another input device
- speaker output selector for teachers
- audio settings to choose a preset such as quiet room, default (with noise suppression off so phonetics are never clipped), noisy room, pro mic, headset, or custom
- echo cancellation, noise suppression, automatic gain, AI denoising strength, speech EQ, and compressor controls when supported by the browser
If a student's audio environment changes during class, adjust the preset first. Use custom controls only when the preset is close but still not clean enough.
6. Close with a clear handoff
Before ending the session, make sure students know:
- what was covered
- what needs more work
- whether homework or a follow-up session is coming next
For group sessions, review presence before final completion. Students who joined can be marked present automatically, but the completion flow still gives the teacher a chance to confirm who was absent before any completion or billing effect is applied. If a student has already completed or passed the lesson material independently (or was manually passed by the teacher), ending the live session preserves their completed status without marking them absent or charging them for an unattended live lesson.
Live sessions run for their scheduled duration (15 to 480 minutes). If a session remains open past its scheduled end time, the system provides an inactive overtime buffer before automatically closing the room.
Cancelling vs. Deleting a Session
The teacher assigned to a session (or an Operations admin or Owner) can cancel or delete it:
- Cancelling a lesson keeps the lesson record in history and never refunds any previously billed deductions. An optional "Deduct lesson credit" checkbox allows charging a late-cancellation fee for teacher standby time.
- Deleting a lesson removes the lesson completely from history and auto-refunds any previously billed deductions.
For full rules, see Cancelling and deleting lessons.
Related pages
- Live Session Follow-Up
- Homework Management
- Real-time Collaboration — snapshots and restoring a lesson document
- Lesson Document Lifecycle — cancel/delete and refund rules